Journey From Http to Https
As we know A non-secure website has an address that starts with “HTTP”, such as http://clickaws.com while a secure website has an address that starts with HTTPS, such as http://clickaws.com.
Why do we use HTTPS?
- Enabling HTTPS to a WordPress website or any website assures visitors that your website is secure.
- Enabling HTTPS to WordPress website or any website assures that sending and receiving data in encrypted form.
- If your website is not HTTPS then your website will rank lower in search engine results.
Steps for converting http to https:
1. Prerequisites:
- Create a WordPress instance in Lightsail, and configure your website on your instance.
- Attach a static IP to your instance. Your instance’s public IP address changes if you stop and start your instance. A static IP does not change if you stop and start your instance.
- Create a snapshot of your WordPress instance or enable automatic snapshots. The snapshot can be used as a backup.
- Add DNS records to the DNS of your domain that directs traffic for the apex of your domain.
2. Connect to your instance
Complete the following steps to connect to your instance using the browser-based SSH client in the Lightsail console.
- Sign in to the AWS Lightsail Console.
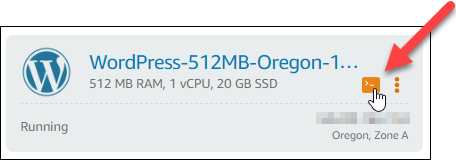
- On the homepage, choose the SSH quick connect icon for your WordPress instance.

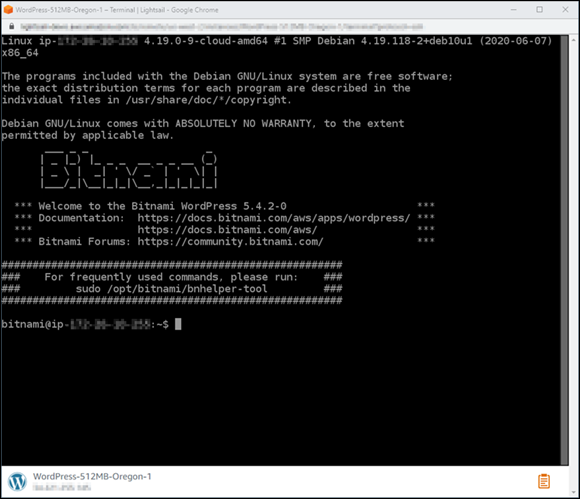
- The browser-based SSH client terminal window opens. You are successfully connected to your instance via SSH if you see the Bitnami logo as shown in the following example.

3. Confirm the bncert tool is installed on your instance
- Enter the following command to run the
bncerttool.
sudo /opt/bitnami/bncert-tool
- if you see
Welcome to the Bitnami HTTPS configuration tool, then thebncertthe tool is installed on your instance.


4. Enable HTTPS on your WordPress instance
- Enter the following command to run the
bncerttool.
sudo /opt/bitnami/bncert-tool


- I see a message indicating that an updated version of the tool is available.
- Enter Y as shown in the Image.


- Enter your primary domain name and alternate domain names separated by a space as shown in the image.


- The
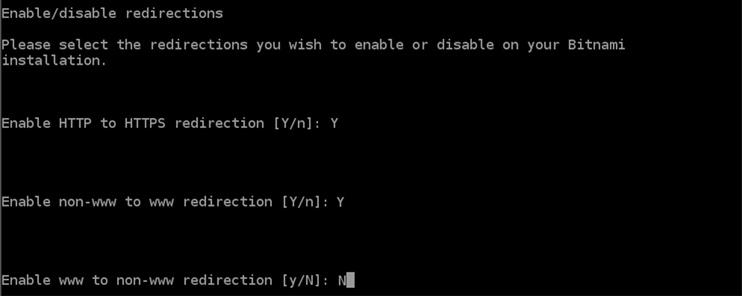
bncertthe tool will ask you how you want your website’s redirection to be configured. These are the options available:- Enable HTTP to HTTPS redirection – Type
Yand press Enter to enable it. - Enable non-www to www redirection. – Type
Yand press Enter to enable it. - Enable www to non-www redirection – Type N and press Enter to disable it.
- Enable HTTP to HTTPS redirection – Type

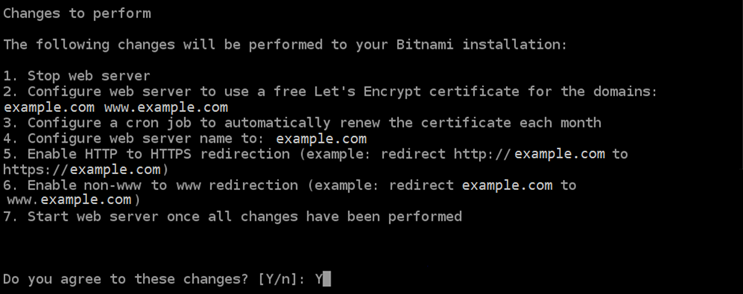
- The changes that are going to be made are listed. Type
Yand press Enter to confirm and continue.

- Enter your email address to associate with your Let’s Encrypt certificate and press Enter.


- Review the Let’s Encrypt Subscriber Agreement. Type
Yand press Enter to accept the agreement and continue.


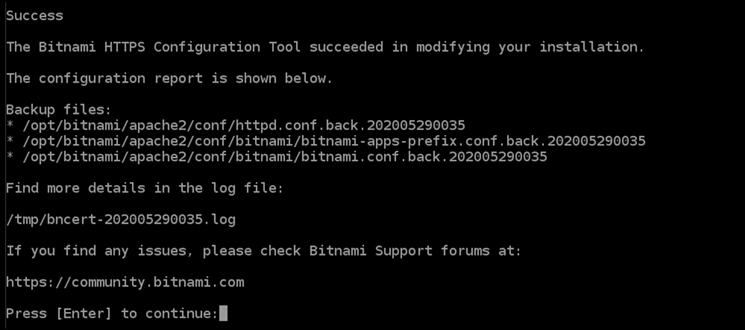

5. Test that your website is using HTTPS
- You should confirm that your website is using HTTPS by browsing to all of the domains that you specified
- When you visit each domain, you should see that they use a secure connection as shown in the following example.
Note: You might have to refresh, and clear your browser’s cache to see the change.
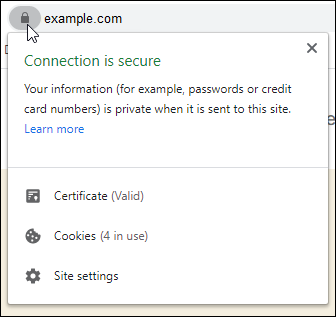

You might also notice that the non-www address redirects to the www subdomain of your domain.
Suggestions, improvements, and queries are welcome.
I hope this blog helps and saves your precious time so that you can spend it with your loved ones. Keep Smiling and show some love !!!
Please share it and Follow me for more content.
You can Support Me from Buying Above Amazon Affiliate Link.
Below is the Links to Series of the Detailed | Step by Step of WordPress Website Hosting on AWS Lightsail :
Part 1: How to host a WordPress website on AWS LightSail.
Part 2: Find Login Credentials of Dashboard of WordPress AWS LightSail.
Part 3: Setting up a LightSail Static IP Address from Dynamic IP Address. (Coming Soon)
Part 3.1: Dynamic IP address of Instances in AWS LightSail. (Coming Soon)
Part 4: How to Register a Domain Name with Amazon Web Service | Register a Domain Name using AWS Route53.
Part 5: Set up Free SSL Certificate on WordPress AWS LightSail.
Thank you for reading, Please if you like hit the Clap button and share it also.
If you like the above blog Series Please Support Me using Buymeacoffee.
References:
https://aws.amazon.com/lightsail/features/


Useful information.
Useful information
Submit your new website to our directory and reach a wider audience.
I have to thank you for the efforts youve put in writing this blog. Im hoping to check out the same high-grade blog posts by you later on as well. In fact, your creative writing abilities has encouraged me to get my own website now 😉
Heya i am for the first time here. I found this board and I find It truly useful & it helped me out a lot. I hope to give something back and help others like you helped me.
Heya i’m for the first time here. I came across this board and I find It truly useful & it helped me out much. I hope to give something back and help others like you aided me.